Select File | New Project...
Click on Prolog and Project
Click Next -> you will see:
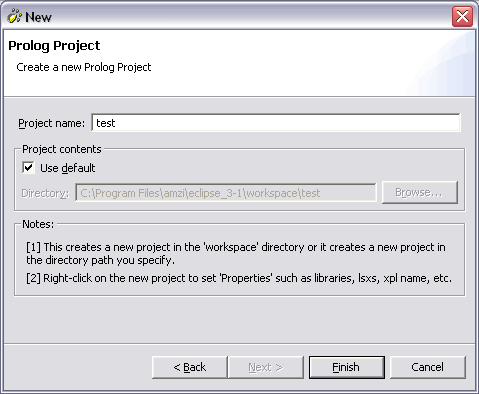
Enter the Project name. This is also the name of the directory that will be created in the workspace directory (as you can see in the dimmed Directory box).
Click Finish
Select File | Import...
Click on Existing Project into Workspace
Click Next -> you will see:
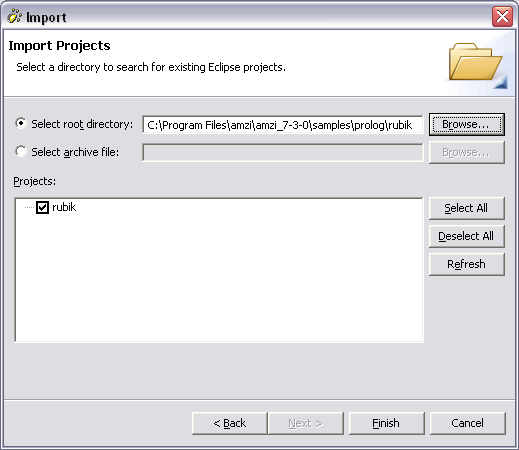
Click Browse... and select the directory that contains the project you want to re-open (or type in the pathname).
Click Finish
Select File | New | File you will see:
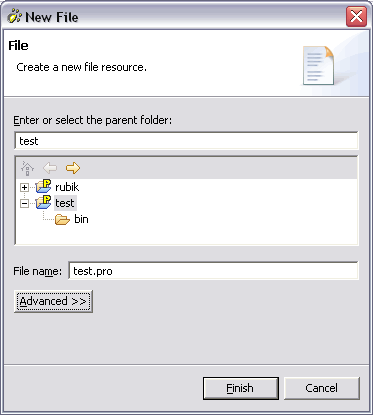
Make sure the project you want to create the file in is highlighted.
Enter the File name ending in .pro.
Click Finish
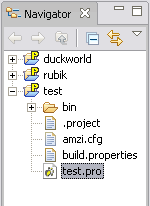
Click on the name of a project you want to import the file into in the Navigator View (see below).
Select File | Import | File system you will see:

Click the Browse button on the upper right to navigate to the directory containing the files you want to add to the project.
Tick the box in front of the names of the files (and directories) you want to add to the named project/folder. (You can press the Browse button to the right of "Into folder" to select another project.)
Click Finish
 When
you create a new file, it will be opened in the Editor View.
When
you create a new file, it will be opened in the Editor View.
Otherwise, in the Navigator View, double-click on the name of the file you want to edit. It will open in the Editor View.
Type in your code.
Select File | Save
When you save a file, a new outline is generated and the source file is checked for syntax errors. Check the Problems View to see the errors:
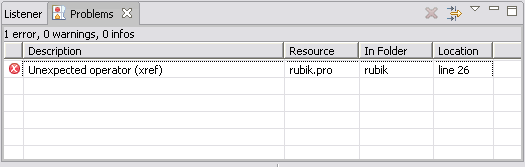
Any errors will be highlighted in your Edit View. You can click on the red boxes in the right margin.

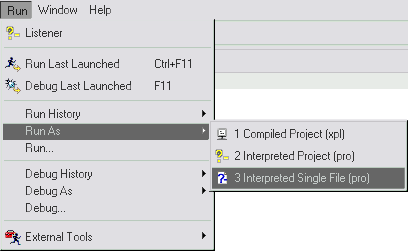
Open a source file for editing (or click on the file name in the Navigator View).
Select Run | Run As | Interpreted Single File (pro)
This start the Prolog Listener in the Listener View:

After the ?- type the goal you want to execute (in this case main.). You can use the arrow keys to retrieve and edit the goals you entered previously.
Type debug. to use the classic box-model debugger.
Type quit. to exit.
Open a source file for editing (or click on the file name in the Navigator View).
Select Run | Debug As | Interpreted Single File (pro)
This opens the Debug Perspective (you were previously in the Prolog Perspective):
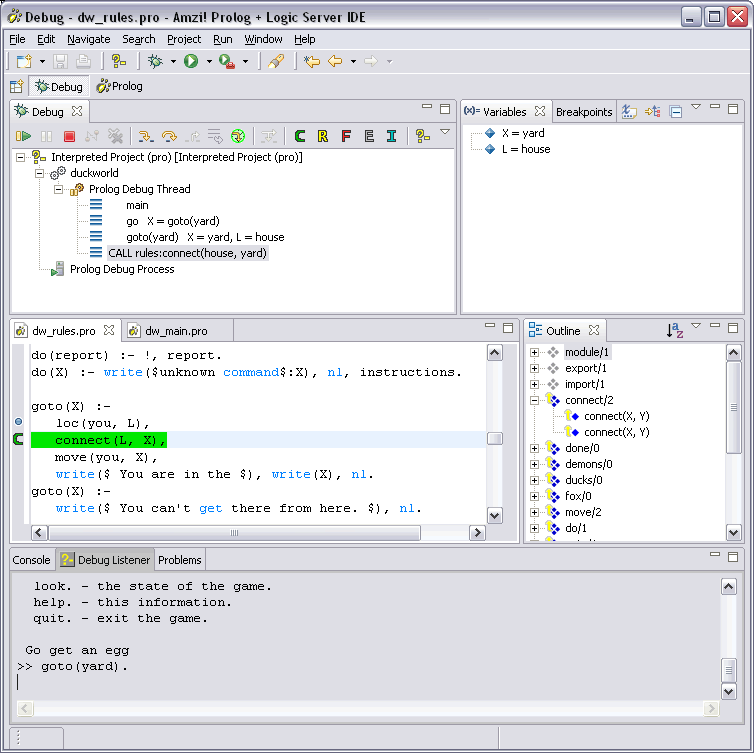
After the ?- type the goal you want to debug (in this case 'main.' followed by the command 'goto(yard).'.) The currently executing line is highlighted with a C for call, R for redo, F for fail, E for exit and I for info. Pausing at each of those debug ports is controlled by the buttons in the Debug View.
The use the buttons in the Debug View in the upper left to ![]() run,
run, ![]() suspend,
suspend, ![]() stop and
stop and ![]()
![]()
![]() step your program.
This view also displays the Prolog call stack.
step your program.
This view also displays the Prolog call stack.
The Variables View in the upper right shows your variable bindings at each level of the call stack.
To set a breakpoint, double-click in the left margin of the source file (see the blue dot).
Press ![]() or type quit.
to exit. Type [Ctrl]-C to break user input.
or type quit.
to exit. Type [Ctrl]-C to break user input.
Click on the paw in the left margin of the Eclipse Window to return to the Prolog Perspective.

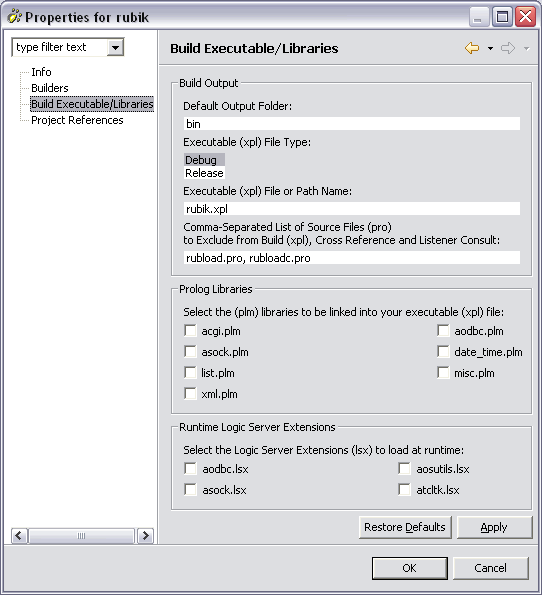
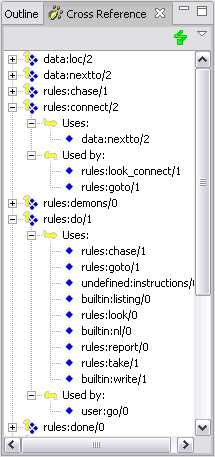 Select
an open editor or a project on the
Select
an open editor or a project on the